Monday, April 30, 2007

Pasta Primavera


One of my favourite magazine subscriptions is Cooking Light. I look forward to receiving it every month as it is full of tasty, healthy recipes that showcase the produce of the season. Tonight I made the pasta primavera from this month's Cooking Light and it was great.

This was a bit of a departure for me, as I tend to always go for tomato based sauces when it comes to pasta. I am not a fan of creamy sauces, but this one was light and extremely tasty. The recipe itself was part of a feature on milk and its health benefits in cooking. This recipe utilizes half-and-half to make the sauce lovely and creamy, yet still keep the calorie count to 338 for each serving. There is also a whole bunch of vegetables, which was just what the doctor ordered after an indulgent weekend in Florida! I did not have any fettuccine and used cavatapi instead, but you could use whatever type of pasta you like. The cavatapi actually worked very nicely.


Pasta Primavera

(Serves 4)

2 cups green beans, trimmed and halved crosswise
2 cups broccoli florets
1/2 cup slices of asparagus
6oz fettuccine
1 tbs olive oil
1 cup chopped onion
2 tsp minced garlic
1/8 tsp crushed red pepper flakes
1/2 cup frozen peas
1 cup grape tomatoes, halved
2/3 cup half-and-half
1 tsp cornstarch
3/4 tsp salt
1/4 cup chopped fresh basil
1/4 cup shaved parmigiano reggiano

1. Cook green beans in boiling water for 1 minute. Add broccoli and asparagus, cook 2 minutes more until veggies are crisp-tender, then remove from pan with a slotted spoon into a large bowl. Return water to the boil, then add pasta, cook 10 minutes until al dente. Drain and add to vegetable mix.

2. Heat oil in a large nonstick skillet over medium-high heat. Add onion and saute for 2 minutes. Add garlic and red pepper, saute for 3 minutes or until onion begins to brown. Add peas and saute for 1 minute. Add tomatoes and saute for 2 minutes. Combine half-and-half and cornstarch with a whisk. Reduce heat to medium and add half-and-half mixture plus salt to the pan. Cook for 1 minute or until sauce thickens, stirring constantly.

3. Add pasta and vegetables to pan and toss to coat. Sprinkle over basil and cheese and serve immediately.

Emeril's Tchoup Chop - Orlando


We just spent a great long weekend in Orlando, playing at Universal and Disney and enjoying the beautiful weather and I wanted to write a review of Emeril's Tchoup Chop, where we had a fantastic dinner on Friday night. My hubby had been there on a conference about a year ago and recommended that our group try it after a hard day riding the rides at Universal Studios and Islands of Adventure. It is located right next to the Universal Complex, at the Royal Pacific resort and is fairly secluded. You wouldn't know it was there unless you were staying at the resort. After having a chat with our server, it seems that this is certainly true as he said it has taken about 4 years to get their name known in the area. A real shame for such a fabulous place, in my opinion. However, at least it was not impossible to get a reservation.

have been construed as "tank top" or strapless. In fact, we argued, almost all women's clothing that would be worn in a hot environment like So, around lunch time we decided to take Rich's advice and book our dinner for that night at Tchoup Chop (pronounced Chop Chop), which serves Polynesian fusion cuisine. They told us that the dress was casual, but that no tank tops or muscle shirts were allowed. This was followed by a lengthy discussion on what they could mean by no tank tops. Myself and R (both of the female persuasion) were completely horrified as everything we bought to wear couldFlorida would fall under these categories. We finally decided that perhaps this was meant as a rule for men. Or perhaps for the "wife-beater" like tank tops that would be worn somewhere like the parks. In any case, this is a nice restaurant, so I guess they don't want people shlepping directly from the park in their grimey, sweaty clothes.

We decided to go back to our hotel for a shower and then headed over to the restaurant at 8:30, for our reservation. When we walked in, we all said "wow!". This place is super nice and very well decorated. It has a very subdued atmosphere, almost zen like. There are 4 enormous chandeliers made from hand blown glass flowers in orange and yellow. In a circle in the middle of the ceiling are dark purple glass cylinders that are lit from within, giving off a wonderful purple glow. A large rectangular pond runs the length of the restaurant, in its centre and it is filled with lillies (albeit fake ones, but they look very real). The water flows over the sides of the pond, giving a waterfall like effect. There is also a great view of the large open kitchen, which can be seen from anywhere in the restaurant. There are some regular tables around the outside, but surrounding the pond are booths made from long, low cylindrical cushions. These were very stylish and meant that no view was obstructed in the restaurant...very asian.

After a brief exchange with the front desk where they thought Rich had said his name was David, we cleared up the misunderstanding then got seated at one of the best seats in the house. They proceeded to tell us that we would have not one, not two, but three servers to take care of us. Then they explained the menu and gave us complimentary shrimp crisps (prawn crackers for the aussies) with the most amazing peanut chilli dipping sauce. I am ashamed to say we put away two servings of these delicious little morsels in record time, they were that good!

I apologize for the lack of photo's, but it was difficult to get a good picture due to the dim lighting and my fellow diners would not have been too happy about me taking 10 minutes to get the pictures of food just right!!

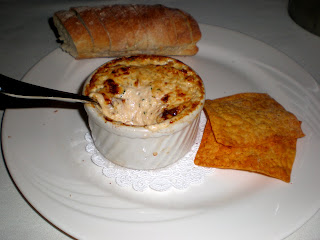
For appetizer, myself and N shared the Marinated Flash Fried Calamari with Homemade Spicy Garlic Glaze and Crumbled Feta Cheese. Very tasty. Whilst Rich and R shared chicken with spinach pancakes, which they said was very good, although they thought the pancakes were a little strange. For main course I had Braised Lamb Shank Marinated in Chinese Mustard & Soy with Maytag Blue Cheese Smashed Potatoes, Garlic Wilted Spinach, Apio Chips and a Sherry Reduction Sauce. This was amazing. I didn't even need a knife, the meat just fell straight off the bone. The mashed potatoes were very rich, but absolutely delicious, especially if you like bleu cheese. Rich had the Braised Lamb Shank Marinated in Chinese Mustard & Soy with Maytag Blue Cheese Smashed Potatoes, Garlic Wilted Spinach, Apio Chips and a Sherry Reduction Sauce, R had the Tchoup Chop Chicken "Hawaiian Style" Marinated, Rotisserie Roasted Half Chicken served with Peanut Fried Rice, Soy Pineapple Glaze, Stir Fried Bok Choy and Baby Carrots and N had the Grilled Double Cut Pork Chop with Ginger Roasted Sweet Potato Mash, Tamarind Barbecue Glaze and Five Spiced Green Apple Chutney. Everyone thoroughly enjoyed their meal and was raving about the flavors.

At this point in the meal, we were so stuffed, but couldn't resist getting a little dessert. N and R shared Emeril's signature dessert, the banana cream pie, which was absolutely enormous, but tasted incredible. I got the pecan pie, which was to die for and Rich got a frozen coconut souffle, which he barely touched for the simple reason that it was so rich in flavour. I tried it an could not eat more than a spoonful, the concentrated flavor of the coconut was almost too much. It would have been great if I was not so full, but was a little much on a full stomach.

So all in all, this was a fantastic place. The service was impeccable. The waiters knew exactly what each person was having, what they were drinking and never let your glass go empty. It was kind of pricey, but really only worked out to be $75 per person including the tip, which for a 3 course meal with wine, great ambiance and spectacular service is pretty darn good in my opinion. If you have the chance to try this restaurant, so it....you won't regret it!!

Thursday, April 26, 2007

M-I-C-K-E-Y!! Orlando Here I come!


Heading to Orlando this afternoon (my first time) for some fun and sun and a little dose of Mickey :) I don't think I will have any Internet connection, so I will be back and posting on Monday. Hopefully with some reviews of yummy food!!! Until then, you can picture me eating ice cream and soaking up some rays :)

Have a great weekend!!

We All Scream For Ice Cream!


With spring well and truly upon us and summer following not too far behind, I have been noticing a lot of recipes for ice cream lately in both my cookbooks and magazine subscriptions. So, I thought to myself a couple of weeks ago that it would be cool (no pun intended) to have an ice cream maker to produce some of these yummy delicacies. Well, that's easy you say...just go out and buy one. Surely they can't be that expensive and in no time you could be whipping up a host of gourmet yogurts, creams and sorbets.

Not so fast though, my friends....I have 2 problems with this theory. The first being that after looking around at the prices of these contraptions, I wasn't sure I was ready to fork over that much cash for them. Not that they are that expensive....seems around $60 is about average...but that brings me to my second issue. Would I use it enough? Would it face the ugly fate of other kitchen appliances that exist in a seldom mentioned corner of the kitchen...the appliance grave!!! (Insert spooky laugh/thunder and lightning.....ok, you get the point). Once prized possessions such as the Breville juicer and slow cooker have made their way into that much maligned cupboard in the corner and others (like the ice tea maker that hubby can't bare to part with from his bachelor days) just seemed to have slunk there on their own, seeming to know that they were never loved in the first place....at least not by me. Sure, these appliance ghosts may rise from the grave perhaps once a year, kind of like the ghouls on Halloween, but they inevitably make their way back for another long slumber....just taking up precious space in our tiny kitchen.

Well, then just throw them out, or give them away, I hear you say.....but the inevitable reply is always...."but I might want to use it sometime in the distant future!". Even as you speak the words, you know they are a lie, however you also know that you cannot bare to part with an appliance that you spent your good, hard earned cash on....even if it was only a few dollars. Yes this is irrational, but you know you do it too.....you know you too, have an appliance grave somewhere in your kitchen. And if you say you don't, you're lying!...haha

I would like to think that an ice cream maker would not suffer this cruel fate, but how could I be sure. Was I willing to risk the $60 to find out? Up until last night, I believe the answer to that question was no. However, as fate would have it, I happened to be perusing the goods in Williams Sonoma (and when I say perusing, of course I mean I was drooling over them) last night when my eye caught a flash of red in the distance. Upon closer inspection, I was delighted to see that it was a sales sticker....a rare creature to be found in a Williams Sonoma store....but not only was it a sales sticker, it was a sales sticker attached to an ice cream maker!!! It was so serendipitous that of course I had to buy it. I mean, 50% off, how could I not? So the wonderful contraption that can churn out such delicious, frozen delicacies as gelato, frozen yogurt, sorbet and good 'ol ice cream, made its way onto my amex card and into my kitchen. Let's hope it doesn't make its way into the grave and that we will be enjoying the fruits of its labor for many years to come!!

Yay for ice cream !!! :)

Tuesday, April 24, 2007

'Lest We Forget

They shall grow not old, as we that are left grow old;
Age shall not weary them, nor the years condemn.
At the going down of the sun and in the morning

We will remember them.


Today is Anzac Day in Australia, the day where we commemorate the WWI diggers who landed in Gallipoli and fought so courageously and defined what it is to be an Aussie. I always like to make Anzac biscuits on April 25th and this year I am even more excited....albeit for a very silly reason...I finally found some golden syrup!! I have been looking for this all important Anzac Biscuit ingredient ever since I arrived Stateside and my supermarket finally stocked it only 2 weeks ago. I saw it and almost did a happy dance, proceeded to buy it even though I didn't know at the time what I would use it for. Then when I found my recipe for Anzac biscuits and remembered that it contained golden syrup...well...I was a very happy girl.


So what is an Anzac biscuit I hear you ask? This website outlines it very nicely, but basically the mothers and wives of the diggers devised the recipe so that it would provide ample nutritional value and would survive the long journey by boat across to the other side of the world. The recipe has never changed and not only was this a welcome gift for the diggers, but we have been left with a very yummy legacy that anyone can enjoy to this day. If you can't find golden syrup, you can replace it with corn syrup or honey, but it is definitely better with the golden-y goodness!!


Anzac Biscuits
(Makes 20)

1 cup plain flour
1 cup rolled oats
1 cup desiccated coconut
2/3 cup brown sugar
125g butter
1 tablespoon golden syrup
½ teaspoon bicarbonate of soda (baking soda)
2 teaspoons boiling water

1. Preheat oven to 325F. Place flour, oats, coconut and sugar in a bowl & mix well.

2. Place butter & golden syrup in a saucepan over medium heat & melt.

3. Place bicarbonate of soda in a small bowl & add water, stir to combine. Add bicarb mix to saucepan & stir. Pour over oat mixture & stir all ingredients together.

4. Roll teaspoons of biscuit mixture into balls & place on a greased & lined baking tray, leaving room for spreading. Flatten each ball gently with a fork. Bake for 15-20 minutes, or until biscuits are golden brown at the edges. Allow to cool slightly on trays before transferring to a wore rack.

Scrumptious Spanish Soup


Tonight's dinner comes once again from Jamie Oliver's - Jamie's Dinners. The photo for this soup in the cookbook looked so tempting, I had to make it. It also allowed me to use some leftover chorizo sausages I had in the freezer. The only thing that was a little off putting for me, was the addition of grated egg....at first, when I looked at the picture I thought it was cheese...grated egg on soup is not something I would have ever thought of. However, Jamie also mentions that he thought this was unexpected when he had this soup in Barcelona, and after trying it, decided that it added a "lovely richness". I figured if he could give it a go then I could too and he was right...it was lovely.

This is a great healthy soup (I'm always on the lookout for good soup recipes), was not hard to prepare and tasted delicious. I will say that Jamie Oliver must be a huge eater....every recipe I have made out of his books so far (which admittedly is not that many....but enough) has served way more than he says. For instance, this recipe says it serves 4, but I easily got 6 servings out of it.


Scrumptious Spanish Chickpea and Chorizo Soup
(Serves 4-6)

Olive oil
5 1/2oz chorizo sausage, finely chopped
1 onion, peeled and finely chopped
1 clove of garlic, peeled and finely chopped
2 sticks of celery, finely chopped
1lb of fresh spinach, washed and chopped
8 fresh tomatoes, deseeded and roughly chopped
1 14oz can of chickpeas, drained
5 cups chicken stock
sea salt and freshly ground black pepper
2oz pata negra, spanish ham or prosciutto, finely chopped
extra virgin olive oil
2 hard boiled eggs

1. Add olive oil into a large pot and add the chorizo. Allow to heat up and cook for a couple of minutes until the fat comes out of the chorizo. Add onion, garlic and celery. Turn down heat and cook slowly for 15 minutes with the lid on. Now take the lid off, stir and add spinach, tomatoes, chick peas and chicken stock. Bring to a boil and then lower heat to simmer for 40 minutes.

2. Remove about 1/3 of the mixture and puree in a food processor. Pour it back in the pot, stir and season to taste with salt and pepper. Remove from heat and stir in pata negra or ham and add 2-3 tablespoons of olive oil. Divide into bowls and grate the hard boiled egg on top.

Chocolate Honeycomb Cupcakes


I'm having honeycomb overload!! Well...not really, but I do have a lot and wanted to use it up before it went soggy. So after introducing some of my work colleagues to the delights of honeycomb today, I decided to use some of the leftovers in these honeycomb cupcakes. I adapted a recipe I found on recipezaar.com, whilst they apparently got it from an Australian magazine called Super Food Ideas.


This recipe seemed perfect as 1) I had just about all of the ingredients and 2) They sounded absolutely scrumptious!! And they didn't disappoint. The cake part of the recipe was so light and airy with the honeycomb giving it an almost cloud-like texture. The dark chocolate on top brought to mind those most fabulous of candy bars...the Cadbury Crunchie...yum!!


Chocolate Honeycomb Cupcakes
(Makes 12)

60g Butter, softened
1/4 cup castor sugar
1 tsp vanilla essence
1 egg
3/4 cup self raising flour
1/4 cup milk (I used 1%)
approx 75g or 1 cup of honeycomb crumbs

Icing
100g dark chocolate
1/4 cup thickened cream

1. Pre-heat oven to 350F and line a 12 hole muffin pan with patty cases.

2. Using a mixer, cream the butter and sugar, then add vanilla and egg. Beat until well combined. Fold in half the flour and milk until mixture is smooth. Repeat with remaining flour and milk and stir until batter is smooth. Either chop or crush honeycomb and stir into batter. Three quarters fill each paper case with batter.

3. Bake for 15-20 minutes, then remove from oven. Leave cakes to cool in the pan for 10min and then transfer to a wire rack to cool completely.

4. Icing: Combine chocolate and cream in a microwave safe bowl and microwave, uncovered, on high for 1-2 minutes, stirring every half minute until smooth.

5. Spread icing on cupcakes. Sprinkle the cupcakes with some leftover honeycomb crumbs and top with with a small chunk of honeycomb.

Monday, April 23, 2007

Jamie's Lamb Cutlets


About a week ago, I managed to pick up a copy of Jamie Oliver's - Jamie's Dinners. I have flicked through it and it looks great. Loads of yummy recipes. There is one really great section entitled "5 minute wonders" where Jamie outlines a bunch of recipes that he creates in...wait for it.....under 5 minutes :) This is great for nights like tonight when I have 2 classes at the gym and don't have loads of time to make a really involved dinner.

On the weekend I snagged some lamb cutlets at the grocery store and decided to try Jamie's recipe for lamb cutlets. he says that he can make this recipe in 4 minutes and 31 seconds, but it took me a little longer. However, it was still only about 10 minutes. He also says that the recipe is enough for one, but the couscous was definitely enough 2. This was a healthy, tasty and very fast meal....great for a Monday night!

Lamb Cutlets
(Serves 2)

3/4 cup of couscous
4 lamb chops, french trimmed
salt and freshly ground pepper
1 tsp ground cumin
extra virgin olive oil
1/2 red onion, finely sliced
sprig of fresh thyme, finely chopped
1/4 fresh red chilli, deseeded and finely chopped
2 ripe tomatoes, finely chopped
1 handful of flat leaf parsley chopped
juice of 1 lemon
1 small tub of hummus

1. Heat frying pan over high heat. Place couscous in a bowl and just cover with boiling water. Dust chops on both sides with salt, pepper and cumin, then add to the pan with a little olive oil.

2. When cutlets have browned on one side, turn them over, then add onion, thyme and chilli, moving ingredients around the pan to cook evenly for a couple of minutes.

3. Finely chop tomatoes and parsley and mix into couscous with a good lug of olive oil and a squeeze of lemon juice. Season to taste, then serve couscous with lamb and onion on top, followed by a big spoonful of hummus.

Sweet Honeycomb


This afternoon I happened to stumble across Haalo's blog, Cook (almost) Anything...at least once and found her recipe for making honeycomb. Now, it occurred to me that in all my 29 years on this earth, that I never once thought to question how honeycomb is made. This is even more astonishing, given that I LOVE both Crunchie and Violet Crumble....both which are near impossible to get Stateside. Needless to say, I was very excited to find such a recipe and also to have all the ingredients on hand. I was determined to go home and make this recipe tonight.

To be brutally honest, my first attempt was a complete disaster. I think my definition of golden brown and Haalo's definition were not at all the same and I just ended up with a big sticky mess. I thought this may be due to the fact that you also cannot get liquid glucose in the States and I had substituted with corn syrup. I therefore went hunting on the web to see if this was an appropriate substitution and subsequently found this recipe from In My Kitchen. It suggested using a candy thermometer to measure when the sugar got to hard crack or 300F and this worked out much much better.

I was a little scared to try again after my first disaster, but I have to say, once I got it right it was loads of fun. I now have a huge tub full of honeycomb and need to figure out what to do with it!! I melted some chocolate nibs and coated some of it, just like a home made Crunchie bar and it is delicious!! Stay tuned for what I end up doing with the rest of it....that is if I don't eat it all first...hahaha!!


Honeycomb

1/4 cup water
1 1/2 cups sugar
1/4 cup light corn syrup
1 tablespoon of baking soda, sifted

1. In a medium-sized deep heavy saucepan, stir the water, sugar and corn syrup together. Clip a candy thermometer onto the inside of the pan. Over medium-high heat, bring the mixture to a boil without stirring. Using a pastry brush dipped in water, brush down the sides of the pan to remove any un-dissolved sugar granules. Continue cooking until the sugar reaches 300F on the candy thermometer, then remove from the heat. The mixture should be a very pale straw color.

2. Working quickly, add the baking soda all at once to the sugar mixture, and whisk for a few seconds, until the baking soda is incorporated. The liquid will bubble up and become foamy. In one smooth movement, pour it into a foil lined 8x12 tin pan. It will spread out, puff up slightly, and have a slightly porous shiny surface. Allow it to harden for about 20 minutes, without touching or moving it. Cut the honeycomb into uneven pieces. Store it in an airtight container at room temperature. The honeycomb will last 1-2 days before it begins to lose its crunch.

Sunday, April 22, 2007

Peter's Lamb Curry


I love curry! I think it is safe to say this is my favourite food. I love Indian, Malaysian, Thia, Indonesian curry's...you name it, I usually like it. So when a week or so ago I bought the Jamie Oliver book, The Naked Chef Takes Off, I had to try the entry entitled "Peter's lamb curry". It looked fabulous, even if it was a bit of work....so today, I decided to give it a go.

At first I was a little intimidated, because I had never heard of "fenugreek seeds". I looked it up on my always knowledgable friend, Wikipedia, where it informed me that "The rhombic yellow to amber colored fenugreek seed, commonly called Methi is frequently used in the preparation of pickles, curry powders and pastes, and is often encountered in the cuisine of the Indian subcontinent. The young leaves and sprouts of fenugreek are eaten as greens and the fresh or dried leaves are used to flavor other dishes. The dried leaves (called kasuri methi) have a bitter taste and a strong characteristic smell".

I had no idea where to even get it. So I asked my Indian colleague who kindly informed me, that yes, Indians do use it a lot in their cooking and he even told me an Indian store where I could buy it. So I took the short detour after work on Friday to Langly Park and found the Patel Brother's Indian store, where they sold huge bags of it for only 99c. I think it is now safe to say that I have a lifetime supply of fenugreek seeds!!

So, after 3 hours of cooking to get the "best Indian curry", according to Jamie, my verdict is....well, that its pretty good. I wouldn't say the best I have ever had, but it was very tasty. I actually couldn't get any lamb at the grocery store this week, so I used beef instead, which I don't think affected the taste too much. So without further ado, here is Peter's Lamb curry recipe.

Peter's Lamb Curry
(Serves 8)

1 hot and fragrant rub recipe (see below)
2 tbs butter
2 14oz cans of chopped tomatoes
1 cup stock or water
3 1/2lb of lamb, diced
1 handful of chopped mint and cilantro
1 cup plain yogurt (I used fat free)
salt and freshly ground pepper
lime juice to taste

Curry Paste
2 inches fresh ginger, peeled
2 tennis-ball sized red onions, peeled
10 cloves garlic, peeled
2 fresh chillies, with seeds
1 bunch cilantro

Hot and fragrant spice rub
2 tbs fennel seeds
2 tbs cummin seeds
2 tbs coriander seeds
1/2 tbs fenugreek seeds
1/2 tbs black peppercorns
1 clove
2 cardamom pods
1/2 a cinnamon stick
salt and freshly ground black pepper

lightly toast all the ingredients in a pan over a gently heat before crushing into a fine powder.

1. Preheat oven to 325F. Lightly toast the hot and fragrant rub mix and then chop the paste ingredients roughly. Add the rub and paste ingredients to a food processor and puree. In a large casserole dish, fry the curry paste mixture with the butter until golden, stirring regularly. Add tomatoes, stock or water and bring to the boil. Cover with foil and place in the oven for 1 1/2 hours to let the flavors intensify. This is the basic curry sauce.

2. Fry the lamb in a little olive oil until golden then add to the curry sauce and simmer for an hour or until tender. Sprinkle with chopped cilantro and mint and stir in the yogurt. Season to taste and add a squeeze of lime juice. Serve with basmati rice.

Fruit Mince Tarts


A week or so before I Easter, I had a huge attack of homesickness...the kind that is almost crippling. And what set it off was a pining for some Aussie food...more importantly, a hot cross bun. Not just any hot cross bun. The wonderful ones you get from a bakers delight. Fresh out of the oven. I love Bakers Delight and unfortunately here in the States there is nothing like it. Then that got me to thinking about all the other wonderful goodies at Bakers delight...the apple scrolls, the cape seed loaf, the boston buns...and so I found an online Australian Bakery in Georgia that sold hot cross buns (Australian style), as well as other goodies such as pies, pasties, sausage rolls, lamingtons and fruit slices. This of course led me to spend an obscene amount of money on some home grown comfort food and I am pleased to say that my freezer is now stocked with said goodies.

I did however, eat the fruit slices already and it got me to thinking about how I should perhaps try my hand at making some of these things myself. That way, I can have them whenever I want and won't have to spend a small fortune to obtain them. The only catch is my skill (or lack there of) as a baker.

I love to cook and whilst certainly not a chef by any stretch of the imagination, I think I am pretty alright. My hubby tends to agree :) But baking is an altogether different beast. However, inspired by the other amazing food bloggers out there I decided to have a crack at the ever popular fruit mince pies...usually associated with Christmas both in Australia and Britain. But when home sickness strikes, food and baked goods should not be confined to a specific season.

The recipe that I tried was after careful study of a quite a few recipes for mince and pies and eventually I decided on a fruit mince recipe from Christmas Joy and the pastry recipe is from Donna Hay. I have never made pastry from scratch before....usually if something calls for pastry, I either buy it, or make something else! It seemed to work ok, although the recipe said it should make 24 tarts and I only just squeezed out 9. Not sure if I had it too thick, but I really couldn't get it much thinner and even if I could, there is no way it would have stretched to 24. I also forgot to brush the pastry with butter and sprinkle sugar just before I baked, which was not a total disaster, but would have made the overall product look a little nicer I think.

Now, the fruit mince on the other hand was to die for. It was all I could do not to just eat this stuff out of the bowl! I have a lot of leftovers, so I could definitely be trying this recipe again soon :) For now, I have 9 not so pretty pies, that still taste good and allow me to manage my homesickness just a little bit better.


Fruit Mince

(Makes about 10 cups)

3 cups dried currants
1 1/2 cups golden raisins
1 1/2 cups dark raisins
1/2 cup chopped dried figs
1 lb of cooking apples, peeled, cored and finely chopped
2 1/2 cups brown sugar, firmly packed
1 tsp ground allspice
1 tsp ground nutmeg
1 tsp ground cinnamon
grated zest and juice of 2 lemons
3/4 cup brandy

1. In a large bowl, place the ingredients and mix well to combine. Cover with plastic wrap and leave overnight.

2. Place the mixture into sterilized jar and leave in the fridge for 4-6 weeks.

(Obviously I didn't wait 4-6 weeks to use this mixture, it was great after 2 days. I am sure it will be better after refrigeration for a few weeks, but there is no reason not to use this mixture straight away).


Pastry Tarts

2 cups plain flour
1/3 cup fine sugar
5oz butter, chopped
1/3 cup iced water
melted butter for brushing and extra sugar to sprinkle

1. Place flour, sugar and butter in mixer and mix until it resembles course breadcrumbs. With the motor running, add water until mixture starts to come together. Turn pastry out onto a lightly floured surface and knead gently. Divide in half, wrap in plastic wrap and place in fridge for 30 min.

2. Preheat oven to 350F. Roll out pastry to appox. 2mm thick and cut out circles with a round cookie cutter, about 23/4 inch round. Line muffin tins (12 hole) with circles of pastry and fill with about a tablespoon of fruit mince filling. Roll out remaining pastry and cut desired shape for the tops (a star is customary, but you can do whatever suits...I did circles). Place the pastry shapes on top of the tarts, brush with melted butter and sprinkle with sugar. Place in the oven for 12-15 minutes or until pastry is golden.

Friday, April 20, 2007

Pork with Lemon-Thyme Sauce


Tonight was all about using up what I had in the freezer and that meant that I had to find something to do with pork tenderloin. After browsing my cookbooks, I decided on this one from my Weight Watchers-Cook It Quick book....still fairly new as I only purchased it a few weeks ago, so I have yet to try many of the recipes. This one was super easy and pretty tasty and very low calorie. I served it with some roast veggies...asparagus, butternut squash, carrots and parsnips...again, to use up what I had in the fridge. Not terribly exciting, as culinary adventures go, but it was a healthy tasty way to finish off the week.

Pork Tenderloin with Lemon-Thyme sauce
(Serves 4)

2 tsp olive oil
3/4 lb pork tenderloin, cut into 1/4 inch slices
1 tsp dried thyme
salt and fresh ground pepper
1 cup chicken broth
1 tbs cornstarch
Juice of 1 lemon

1. In a large, non-stick skillet, heat the oil and then add pork in a single layer. Sprinkle with thyme, salt and pepper. Saute for approx. 2 min, then turn and saute until cooked through.

2. Place broth in a small bowl, then add cornstarch and stir until smooth. Pour the broth mixture into the skillet, add lemon juice and simmer until sauce has slightly thickened, about a minute. Serve and pour over some of the sauce.

Thursday, April 19, 2007

Shrimp with Tarragon and Tomato Sauce


All I can say about this dish I made for dinner tonight is Wow!! A total surprise. I happened to pick up the April edition of Everyday with Rachel Ray at the supermarket the other week...something I have never done before. I actually like watching her 30 minute meals, but have never been compelled to read her magazine. I was given Rachel Ray's 365 No Repeats for Christmas 2 years ago and whilst the recipes seem good, most are very fattening, so I tend to steer away from her. However, I was bored and the promise of checking out some new recipes...even unhealthy ones...won me over at the checkout line. Well, this shrimp recipe looked tasty, healthy and easy, so I thought I would make it on a night when Rich was at class...i.e. tonight :) As I have mentioned in the past, Rich does not share my love for our shellfish friends....or as he calls them, cockroach of the sea.

Well, I was not prepared for the taste sensation that was to ensue!! There really are not a lot of ingredients, but I think the addition of the licorice-y tarragon really made the flavors soar. If you like shrimp and get the chance to make this dish....definitely try it, it won't disappoint :)


Shrimp with Tarragon and Tomato Sauce
(Serves 4)

3 tbs Olive oil
2 Carrots, finely chopped
2 ribs of celery, finely chopped
3 shallots, thinly sliced
6 white mushrooms, chopped
2 lbs large shrimp ,peeled and deveined
salt and ground pepper
1/2 cup dry white wine
One 15oz can tomato sauce
5-6 sprigs fresh tarragon, leaves chopped
1 loaf peasant bread, thickly sliced
2 cloves garlic, smashed peeled and halved

1. Pre-heat the broiler. Ina large, deep skillet, heat the olive oil over medium-high heat. Add the carrots, celery, shallots and mushrooms and cook until tender, 7-8 minutes. Add the shrimp and cook, stirring a few times, until pink and almost firm, about 4 minutes. Season with salt and pepper. Stir in white wine, tomato sauce and tarragon and heat through for 1-2 minutes; remove from heat.

2. Toast bread slices in the broiler, rub with garlic and drizzle with olive oil. Serve the shrimp and sauce in shallow bowls with hunks of the bread for mopping.

Sugar High Friday #30 - Flower Power


I am very excited to be putting in my first ever entry for Sugar High Friday. This month, the blog event is being hosted by Monisha over at Coconut Chutney and the topic is flower power. I thought this was a fabulous topic given that spring is (at least supposed to be) upon us....as I stare out at the cold, rainy day outside...haha. When I first read the topic I was a little stumped at what I could do....but it only took me a second to realize I had the perfect entry!!

About a year ago, when I was researching favors for our wedding in Hawaii, I came up with this crazy idea that people might be interested in some really different flavored shortbread. I had a little business idea in the back of my mind for a few weeks, but then came crashing back to reality with the realization that I am not a professional baker and do not have the skills or expertize (or access to a very large, industrial kitchen) to pull off such a venture. However, before this little piece of reality bit me on the backside, I invested some time into coming up with what I thought (in my own little universe) some interesting ideas for shortbread recipes. Turns out, they weren't so crazy and that other people, namely my hubby and others in my family who I subjected to my cookies, actually really liked them. Hence for the first time, I share my recipes for both Hibiscus High Tea shortbread and Lavender Shortbread.


These 2 flavors are very different from one another, but are really spectacular and very surprising. When you bite into the buttery shortbread, your taste buds are delighted by the tangy, almost citrus flavor of the hibiscus and the almost smokey flavor of the lavender. You really have to experience it to truly appreciate how great these cookies taste. I think they are made even more adorable cut into the shape of daisies....like I said, the perfect recipes for a Flower Power themed SHF!!! Enjoy!! :)

Hibiscus High Tea Shortbread

1 stick of butter
1 cup plain flour
1/8 cup of corn starch
1/4 cup fine sugar
1 tbs Honey
pinch of salt
2 bags of Hibiscus Tea

1. Pre-heat oven to 300F. Cream butter and sugar, then mix in honey and vanilla.

2. Mix dry ingredients together and then mix into the butter mixture until combined into a ball of dough.

3. Roll out dough on a floured surface and cut into desired shapes.

4. Cook for approx. 30min, turning 180 degrees halfway through baking, to ensure even color.


Lavender Shortbread

1 stick of butter
1/4 cup of fine sugar
1 cup of plain flour
1/4 cup of cornstarch
pinch of salt
1 tsp of Lavender
1/2 tsp vanilla

1. Pre-heat oven to 300F. Cream butter and sugar, then mix in vanilla and lavender.

2. Mix dry ingredients together and then blend into the butter mixture until combined into a ball of dough.

3. Roll out dough on a floured surface and cut into desired shapes.

4. Cook for approx. 30min, turning 180 degrees halfway through baking, to ensure even color.

Wednesday, April 18, 2007

Israeli Couscous with Squash and Radicchio


I like to try and have at least one or two vegetarian meals a week and it gets harder and harder to come by interesting recipes. When I saw this recipe in this months Bon Appetite, I thought it looked really interesting and wanted to try it. Rich and I went to a Mediterranean cuisine demonstration course last year where they used Israeli couscous, and we liked it then....so I was excited to see another recipe that used it. It seems to be a fairly underutilized ingredient, but I think it has a great texture...totally different from regular couscous.


I made a couple of changes to the original recipe, as it was supposed to be served with a parsley butter. I was not enthused to put 6 tbs of butter into the recipe, in mind, unnecessarily. So, I cut out the butter and just added some parsley to the entire dish at the end, and I think it worked great. I don't think it needed the butter....but that's just my opinion and I am always tyring to find ways to cut the fat out of a recipe. Otherwise, this was a very healthy, tasty meal and it even got approval from my meat loving hubby :)

Israeli Couscous with Squash, Radicchio and Parsley
(Serves 4)

2 tbs Olive oil
1 large onion, chopped
3 tsp grated lemon peel, divided
1 8.8oz package toasted Israeli couscous
3 cups low-salt chicken broth
3 cups 1/2-inch cubes peeled butternut squash (about 12 oz)
1 cup diced radicchio
3/4 cup finely grated Parmesan cheese
1/2 cup (packed) fresh Italian parsley leaves

1. Melt 2 tbs of Olive oil in a heavy large saucepan over medium-high heat. Add onion and 2 tsp of lemon peel. Cover and cook for 5 minutes. Add couscous; saute for 2 minutes.

2. Add broth and squash; bring to a boil. Reduce heat to medium. Cook uncovered until couscous and squash are tender and mixture is still moist, about 10 minutes. Mix in radicchio and cheese, season to taste with salt and pepper.

3. Meanwhile, finely chop the parsley, add at the last minute and stir through. Top with extra parsley and remaining lemon peel, then serve.

Tuesday, April 17, 2007

Easy Paella


So once again, I am turning to the blog of Vicious Ange for my dinner selection tonight....the last one this week, I promise!! (I am living vicariously through her cookbooks...hahaha). She posted this recipe from Bill Granger and I just had to try it as I love love love Paella. Rich is not such a big fan, so when we go to restaurants, I can rarely order it, as you usually have to get it for 2. Having said that however, he liked this recipe....albeit after he picked out the prawns. I thought it was very tasty and easy to make. The only changes I made to the original were that I needed to add more stock, as the rice was still a bit crunchy after the original 2 cups was absorbed. I think I added another cup and that made it much better. I also didn't have enough chicken, so I used another chorizo sausage and that also worked out nicely. I highly recommend this recipe....delish!!


Easy Paella

(serves 4-6)

1 tbs olive oil
1 chicken breast, cut into bite size pieces
1 onion, finely chopped
2 chorizo sausage, chopped
1 cup basmati rice
1 tsp ground turmeric
1 425g can of chopped tomatoes
1 red capsicum, chopped
1 small red chilli, finely chopped
3 cups chicken stock
250g prawns, peeled
1 425g cannelini beans, rinsed and drained
100g baby green beans, topped and chopped
2 tbs chopped cilantro

1. Heat oil in large, deep fry pan over medium heat. Cook the chicken pieces for 3-4 minutes, turning until golden brown and cooked through. Remove and set aside to drain on a paper towel.

2. Add the onion and the chorizo to the pan and cook, stirring occasionally for 1-2 minutes until the chorizo begins to get crisp. Add the rice and turmeric, cook stirring for 2 minutes, then add the tomatoes, capsicum, chilli and stock. Bring to a boil, then reduce heat to medium-low and cook, stirring occasionally for 15 minutes or until all the liquid has been absorbed.

3. Return the chicken to the pan with the prawns, cannelini beans and green beans. Toss and heat through for 1 minute. Stir in the cilantro and serve immediately.

Hay Hay its Donna Day #11 - Mousse


Having only started this blog a week or so ago, I am a little nervous to be entering my first blog "competition". I have been looking at past episodes and the entries are truly amazing. There are a lot of talented cooks out there!! So the Hay Hay its Donna Day event was started, and is run by Barbara over at the winos and foodies blog. This month it is hosted by Helen of Tartelette and the theme is "mousse"....whatever kind you like. Helen's inspiration recipe of white chocolate and blueberry mousse looked delicious, but I wanted to stay away from the chocolate mousses, as I thought there would be a lot of variations on that theme....not that there's anything wrong with that, who doesn't love a good chocolate mousse!!! I thought about doing a savory mousse, as I have very fond memories of my mothers Salmon mousse, from my childhood. But when I stumbled across this Key Lime mousse, it just seemed perfect.


This is my first time making a mousse, so I wasn't sure what to expect. It turned out to be pretty easy and straight forward and the tartness of the mousse was fantastic!! The texture was incredibly light and airy. I decided to substitute the coconut in the original recipe with graham cracker crumbs to make it more like a key-lime pie and I think that worked out great.


Key-Lime Mousse
(serves 4)

3/4 Cup fresh lime juice (preferably from key limes)
1 envelope unflavoured gelatin
4 large eggs, separated, at room temp
3/4 cup sugar
1 cup whipping cream
extra whipped cream for topping
graham cracker crumbs for topping

1. Place 2 tbs of lime juice in a small bowl. Sprinkle gelatin over and set aside to soften. Whisk yolks in heavy small saucepan to blend. Whisk in remaining lime juice, then 1/2 cup of sugar. Cook over low heat until mixture thickens slightly, stirring constantly. Remove from heat, add gelatin and stir until dissolved. Pour into a large bowl and cool.

2. Beat 1 cup of cream in a medium bowl to form soft peaks. Gradually add remaining sugar and beat until stiff. Using clean beaters, beat egg whites in another bowl until soft peaks form. Fold whites into cream. Gently fold cream mixture into lime mixture. Divide among 4 glasses.

3. Cover and refrigerate until firm.

4. Top each mouse with a dollop of whipped cream and sprinkle with graham crackers.

Source: adapted from http://fooddownunder.com

Monday, April 16, 2007

Mahi-Mahi with Blood Orange Salsa

I found this great low fat, low calorie recipe last week on epicurious.com whilst looking for a recipe that uses blood oranges. I had picked some up at Wholefoods, but wasn't sure what I wanted to do with them. Rich is not really a fan of fish, but I am trying to ease him into it and he actually thought this was ok....at least, he ate it and didn't spit it out!! I thought the blood orange with Mahi-mahi was a great combination, very tangy. I tossed together a quick salad to serve with it, made from mixed greens, tomatoes, spanish onion, gorgonzola, chopped walnuts and fat free raspberry vinaigrette. This would have been nice to eat sitting outside, in the warm sunshine, overlooking our budding garden, however unfortunately we had to huddle inside with heater on, listening to the gale force winds outside....oh well, at least the company and the food were good :)

Mahi-Mahi with Blood Orange, Avocado and Red Onion Salsa
(serves 2)

1 blood orange
1/2 cup of avocado cubes
1/3 chopped red onion
2 tsp minced red jalapeno
2tsp fr sh lime juice
2 tsp olive oil
2 6oz mahi-mahi fillets

1. Using a small sharp knife, cut and peel the white pith from the orange. Working over a small bowl, cut between the membranes to release the segments. Add avocado, onion, jalapeno and lime juice to oranges in a bowl. Stir gently to blend. Season salsa to taste with slat.

2. heat oil in heavy skillet over medium-high heat. Sprinkle fish with slat and pepper. Add fish to skillet and saute until brown and cooked through, about 5 minutes per side.

3. Place 1 fillet on each of 2 plates. Spoon salsa atop fish and serve.

Sunday, April 15, 2007

Steak and Guinness Pies

I saw this recipe on Vicious Ange's blog and thought it sounded fantastic. Today was the perfect day to make this dish also, because it was totally miserable outside...cold, wet, rainy....blah. It is a lot more time consuming than I would usually do, but I had lots of time today and it was not really involved, just long periods of simmering and baking. I decided to do individual pies, instead of one big one, simply because its easier to serve that way. I also served this with a side salad. I could have done some roast veggies, but the pie already had quite a few veggies in it and Rich loves his salad :) I just threw together whatever I had in the fridge to make a basic side salad.

Jamie Oliver's Good Old Steak and Guinness Pie
(Serves 6)

1.5lbs Stewing beef, diced
sea salt and freshly ground black pepper
2 heaped tbs flour
Olive oil
1 onion, peeled and chopped
1 carrot, peeled and chopped
4 sticks celery, washed and chopped
2 parsnips, peeled and chopped
1 handful of mixed fresh herbs (ie rosemary, thyme, bay)
1 pint Guinness
2 x 15oz tins of chopped tomatoes
1 pack of puff pastry
1 egg beaten

1. Season beef generously with salt and pepper, sprinkle in flour and toss until coated. Heat 2-3 glugs of olive oil in a large pan and fry meat until golden brown.

2. Add the onion and fry another minute, then add carrot, parsnips, celery and herbs. Fry for a further 4 minutes and then add Guinness and tomatoes. Bring to a boil, then simmer uncovered for 2 hours or until meat is tender. Season to taste.

3. At this point, you can move the stew to the fridge until ready to serve. This will also intensify the flavor.

4. To make pies, preheat the oven to 375F. Put meat filling into individual dishes (or one large dish, if making one pie). Cut pastry to circles about 1 inch bigger than the top of the dishes. Brush the rims with beaten egg, place the pastry on top and squash the excess down the sides to secure. Lightly score the top in a criss cross pattern and brush with remaining beaten egg. Bake for 45min until golden brown and bubbling.

Salad

handful or arugula and baby spinach
1 cup of cherry tomatoes, sliced in half
half a red onion, sliced
1/4 cup gorgonzola
1/4 cup walnuts, chopped
edible mixed flowers

dressing
2 tbs balsamic vinegar
5tbs olive oil
2tbs chopped basil
salt and pepper
chopped sunflower seeds

1. Place everything in a bowl and toss.

Spinach and Sun-dried Tomato Frittata

I found the recipe for this frittata a couple of weeks ago on the self.com website and it is seriously some of the best eggs I have ever had. So tasty! I decided to make it for Sunday breakfast this morning and the best part is, it is only 289 calories for the entire serving (although I put a little cranberry and orange marmalade of my toast, for an extra 50 cals). The only thing I have found with this recipe is that the original baking time suggested is 12-14 minutes, however I think it needs a few more minutes in order to fully cook in the center. So I am going to suggest cooking it for 16-18 minutes.

Spinach and Sun-dried Tomato Frittata
(serves 4)

Cooking spray
2 tsp olive oil
1 small shallot, chopped
1 cup packed fresh spinach, chopped
4 whole eggs
4 egg whites
8 sun-dried tomatoes, chopped
1/2 cup asiago cheese, grated
2 tbs chopped fresh basil
1/4tsp salt
1/8tsp freshly ground black pepper
4 slices whole wheat toast
2 cups fresh berries

1. Heat oven to 425F. Coat small ramekins with cooking spray and set aside.

2. heat oil in a pan over medium heat, then cook shallots until soft, but not brown, 2-3 minutes. Add spinach and cook for another 2-3 minutes. Remove from heat.

3. Lightly whisk eggs and egg whites in a bowl. Stir in sun-dried tomatoes, cheese, basil, spinach mixture, salt and pepper. Spoon into ramekins and bake for 16-18 minutes.

4. Serve with 1 slice of toast and 1/2 cup of berries.

Saturday, April 14, 2007

Dinner at Severn Inn

I left it up to Rich to pick the restaurant tonight and he chose to go to the Severn Inn in Annapolis. It was a great choice and I was very surprised. We had seen this place last summer, but I had totally forgotten it was even there. Its very out of the way, located almost underneath the Severn River Bridge just outside of Annapolis. Unfortunately it was a little cold and rainy, so we couldn't take full advantage of the river views and the lovely deck seating they have on the waters edge.

It was a pretty fancy place.....you can park your boat at their private jetty, need I say more!! And a little on the pricey side, but the food was good and the service great. We started with some crab dip, although Rich doesn't really like seafood, so he didn't eat that much. Then for our main, he had veal tenderloin and I had Maryland's famous crab cakes. These were the strangest looking crab cakes I have seen, but they were very good. Mostly meat and not a lot of filler, just the way I like them. Then we also opted for dessert, where Rich had a blueberry key lime pie and I had a mango crisp. Rich loved his choice and said it was fabulous. I find it hard to turn down a crisp if its on the menu, as they are probably one of my favourite desserts and I did like this one....however, I have to say the flavor of the mango was a little strange. I think it was a bit too tropical. I would rather have apple, pear, peach or something like that. It was still very good though.

This is definitely a special occasion restaurant because of the prices, but we had a great night and it was a lovely way to celebrate our first 6 months of marriage.

Friday, April 13, 2007

Individual Pavlova's

This is a bit of a red letter day in our household, as I have made dessert 2 nights in a row! I very rarely make a dessert as we always end up eating way too much. However in my quest to empty out the fridge this week, we just had some store bought minestrone soup for dinner (about 160 calories per serve) with some ciabatta crostini's. Therefore I thought it would be ok to have a little dessert and all of the other food bloggers have inspired me to do a little "baking".

So, in an effort to be somewhat healthy, I decided to make individual Pavlova's as they are predominantly made of egg whites, with just a little sugar. And by doing it this way, instead of making one big one, I can control the portion size.

For those who are wondering what a Pavlova is, it is a dessert that originated in Australia in the 1920's (although some say it originated in New Zealand) and is named after the Russian ballerina, Anna Pavlova. It is basically a meringue base, with fresh cream and fruit on top. In order to reduce the calories, I used fat free cool whip instead of cream and then topped with strawberries, kiwi fruit, peaches and raspberry puree. The quintessential Pavlova is topped with passionfruit and I feel like it isn't really one without it, but passionfruit is almost impossible to get in the States. I did see some at wholefoods last week and tried to get some this afternoon, but alas, they were gone :( Therefore, I decided to puree some raspberries in the food processor to make the sauce.

The only major source of calories in this dessert is the sugar, but there is not a lot, so it is quite healthy, as far as desserts go.

Rich had never had this before, when I first met him, but it is now one of his favourite desserts, so he was also very pleased to be getting a second helping of dessert this week!!!

I have no idea where I got this recipe from, as it is jotted down in a note book and I have had it for years. But it is fairly fool proof and always yields quite good results. You can double to make a single Pavlova, whatever takes your fancy :)

Individual Pavlova's
(makes 4)

2 egg whites at room temperature
1/3 cup of granulated (castor) sugar
2 tbs cornstarch
1/4 tsp white vinegar
1/2 tsp vanilla
1/2 cup fat free cool whip (or fresh whipped cream if you're not counting calories)
fresh fruit of your choice

1. Preheat oven to 250F.

2. Beat egg whites and vinegar with a mixer (a stand mixer is preferable, but you can do it with a hand mixer...it just takes longer) until fluffy. Slowly beat in sugar until the meringue is stiff and forming peaks.

3. Add in cornstarch and vanilla and whisk a little more, being careful not to over mix.

4. Place meringue into piping bag and pipe circles onto wax paper on a baking sheet (you could just spoon it on also).

5. Place in the oven for 35-40min and then turn the heat off. Leave the meringue shells in the oven for another hour, or until completely cool.

6. Spoon cool whip onto the top of the meringue, add sliced fruit of your choice and serve promptly so the meringue doesn't become soggy from the cool whip/cream.